
Here’s how to make a book page garland along with 12 other paper craft ideas. Simple, easy projects you can make today.

I love making projects with these.
Book pages.
Specifically, book pages from this vintage set of encyclopedias that Buddy chewed up 18 hours after I brought them home from a yard sale. The entire “chewgate” situation happened years ago, but I made lemonade out of chewed up encyclopedias lemons and kept the books in my craft closet so I could make a few projects.
And make I did.
So far I’ve made:
- these paper bowls
- this paper bird wreath
- this book page wreath
- this book page fall hutch decor
- these book page trees
And today I thought of a new project.
A project that was basically FREE to make.
So I pulled out those encyclopedias and made….
…..this.

A DIY book page garland with mini tassels.
You know those wood bead garlands that are everywhere?
This is just like that only with a little more texture.
You could drape it over a stack of books or loop it over the side of a basket or toss it in a bowl or add it to a coffee table display. And it’s so easy to make.
Here’s the step-by-step DIY for this book page garland.
DIY Book Page Garland With Wood Tassels
supplies:
book pages
thread
needle
scissors
tutorial for mini wood tassels found here

Step 1: Cut “bow ties” out of paper
I cut out 5″ x 5″ squares of paper and then cut a triangle out of each side.
It looks like a bow tie.
Make sure there’s a larger space in the middle, you’ll need that to attach it to the garland.
I cut out about 50 bow ties. It’s so much easier if you cut several out at a time with layers of paper.

Step 2: fold sides and scrunch
Fold both sides of the bow tie in to make a flower.
Next, scrunch the entire piece together and fold it at the base (you can even twist it together loosely to hold it together).
Repeat the same thing with each of the cut-out bow ties.

Step 3: thread together
Knot the end of the thread and then thread the pieces of book page together using a medium-size embroidery needle.
Insert the needle at the base of the folded paper and thread all the way through.
Keep threading the folded pieces of paper to form the garland.

Step 4: Keep threading
You can make the garland whatever length you want it to be.
My garland is about 30 inches long and I used about 50 pieces of book page flowers.
Knot the end of the garland once you have the desired length.

Step 5: add the tassels
You can make these DIY mini tassels here.
Then simply sew them onto the end of the garland with the same embroidery needle.
You’ll need to add each tassel separately.
If you don’t want to make the tassels, you could always add a string of wood beads (or even a single wood bead) to the end of the book page garland.


Here’s the finished DIY book page garland.
It’s the perfect project for spring and it’s neutral and simple and goes with almost everything and it’s almost FREE to make (especially if you have the wood beads for the ends).
And now?
Want a few more spring paper project ideas?
Oh, good.
A few friends of mine showed up with tons of inspiration.
DIY Spring Paper Crafts

Easter Banner Printable | The Happy Housie
Framed Watercolor Flowers | Craftberry Bush
Designer Coasters | My Sweet Savannah
How to Create a Monet-Inspired Painting with Kids | Robyn’s French Nest
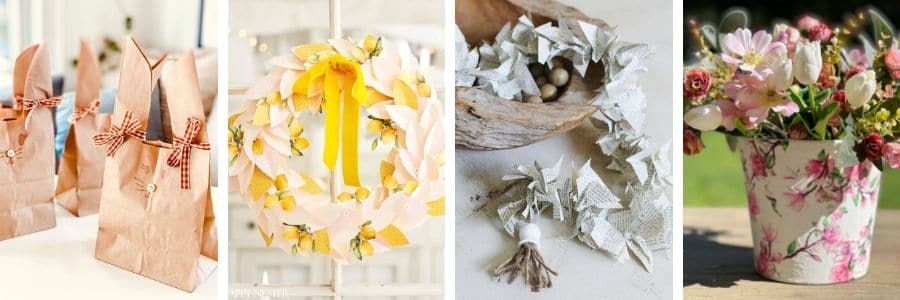
How to Make a Paper Bag Bunny | Most Lovely Things
Lemon Wreath DIY | Happy Happy Nester
DIY Book Page Garland With Wooden Tassels | Thistlewood Farms
How to Make a Terra Cotta Pot Beautiful | My 100 Year Old Home
Want to know how to decorate your home for free?
Click here to get my FIVE BEST secrets.
<!– Removed after blog post link 5-28-2019

–>
Comment List (0):
Load More Comments Loading...